Tuesday, October 25, 2016

How to Recover photo


Basic Knowledge of Photo

Recover photo 1

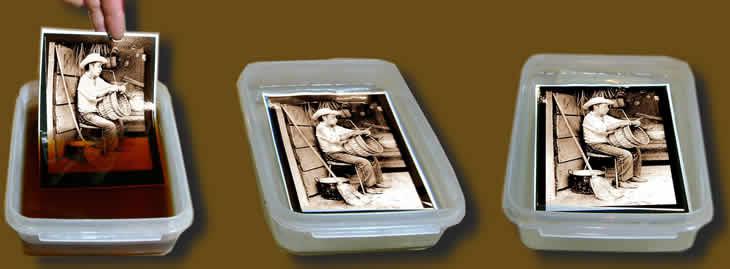
Photo refers to the image of people or things shown on photographic paper and formed after exposure, developing and fixing. In the past, even a black and white photo is very precious. Later, with the development of technology, colorful photos became very popular. At that time, since digital camera was too expensive to afford and the capacity was limited, users choose to develop photos and put them together maybe in an exquisite album.

However, as time goes by, lots of users drop the habit of keeping paper photo. Instead, an increasing number of users are getting used to saving digital photos on computer hard drive, USB flash drive, memory stick and other devices. This is a much more convenient way to record the valuable memories or beautiful scenarios.

With the advent of the digital era, digital cameras and mobile phones break the limit of viewing photos only after developing, so that we can now view them on the capturing devices or computers more conveniently. The digital photos we get can be stored directly into storage media, so lossless photo saving can be achieved. Moreover, this pictures saving method has no time limitation. What we mean is that the paper photos users get traditionally after developing may be faded after a period of time no matter how careful users are in protecting them. It’s just unavoidable.

In addition, we’re now able to process and edit our photos to add effects on them so as to make them more joyful and beautiful, thanks to the development of photo processing software. Therefore, picture is more than just a way to record things; it also turns into a way of entertainment.

The Most Popular Photo Storage Devices

Digital camera and mobile phone are becoming more and more popular for photo capturing. However, the internal storage of them is very limited while the requirement for large capacity to store a large quantity of photos is increasing. Noticing that, the storage equipment manufacturers start to figure out ways to make that happen so as to attract more consumers.

As you may know, storage equipment is used to receive and store data, and usually magnetic media, optical media and semiconductor media are included. Just like film is used in a film camera to save pictures, digital camera or mobile phone also needs a storage device with a certain capacity to store the pictures taken by it. A couple of storage devices you may see in digital camera or cellphone will be introduced in the following up content.

  • SD Card – Secure Digital (Memory) Card: it is a type of convenient device based on semiconductor flash memory technology. Its data transfer and physical specification is evolved on the basis of the MMC. Therefore, SD device is fully compatible with MMC. But in general, the read and write speed of SD card is superior to that of MMC; the former can reach 10MB/sec or more.

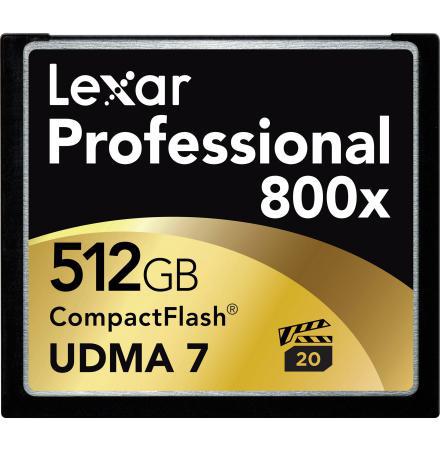
  • Recover photo 2 CF Card – Compact Flash Card: it is among the three largest memory cards appeared in early 1990s (the other two are Miniature Card – MiniCard and SmartMedia card). Generally, it has a read and write speed up to 20MB/sec and a maximum capacity of 512GB. It was really incomparable in the memory card field at that time. However, CF card is not widely used in fashionable digital cameras because of its relatively large size.

  • Memory Stick: it is a removable storage medium firstly developed by Sony Corporation in Japan. Memory stick is used in various Sony products, including PSP and PSX series game consoles, digital cameras, MP3 players and Sony Ericsson mobile phones, to save data like a computer hard drive.

Understand the Reasons for Why We Need to Recover Photo

It must be familiar to you: you’re so attracted by the picturesque landscape or so excited that you can’t help taking photos in different places. After you cool down or when you’re going to take more, you may find the spare space in storage device is too limited. At this time, you’re forced to manage the pictures you have so as to make room for new pictures.

The most commonly used methods for dealing with such problem are: transferring photos from the portable storage media to computer hard drive, deleting unnecessary and deleting the same photos. Unfortunately, lots of tragedies take place during this process. Users may delete useful, even valuable phones while managing storage space.

Recover photo 3 Apart from this, they may also get their mobile devices invaded by virus when they are transferring photos to computer hard drive. And it may lead to the accident that those devices can’t be opened again, which means they’re not able to see or manage all pictures in them anymore.

What’s more, even all the photos users need have been already transferred to computer hard drive successfully, photo loss could still happen when users are operating the computer. After all, system crash, wrong deletion of photo/partition, accidental partition formatting, virus attack, sudden power outage and photo lost during cut and paste could all become a nightmare for users who cherish so much about their picture. Thus, please be extremely careful when doing all these things.

However, what if the loss of significant photos really turns into reality? What are users supposed to do to recover photo as they want? How to recover deleted pictures from computer hard drive? Could it be possible that users recover deleted photo files on computer on their own? Questions like those are put forward, indicating that pictures recovery issue is indeed under the spotlight. Please don’t ignore what we’re going to say in the following paragraphs because anyone could become a victim to a photo loss disaster.

The two most effective ways to recover pictures from storage devices like hard drive are: asking professionals for help and choosing a powerful recovery program.

Download Free Digital Picture Recovery Software for Pictures Recovery

If users choose to rely on professionals (or professional companies), instead of recovery program, they’d better make sure two things: one is the fee charged by them to recover deleted pictures from computer hard drive is within users’ affordable cost (users need to understand that it could be a waste of money if some free digital picture recovery software downloaded from the internet can do the same job); the other one is that users must confirm that no confidential or sensitive data is included in the deleted files (otherwise, users’ privacy may be leaked out, causing serious problems).

Given these two points, we suggest all users to try to recover deleted photos from hard drive or other place by downloading free digital picture recovery software – MiniTool Power Data Recovery.

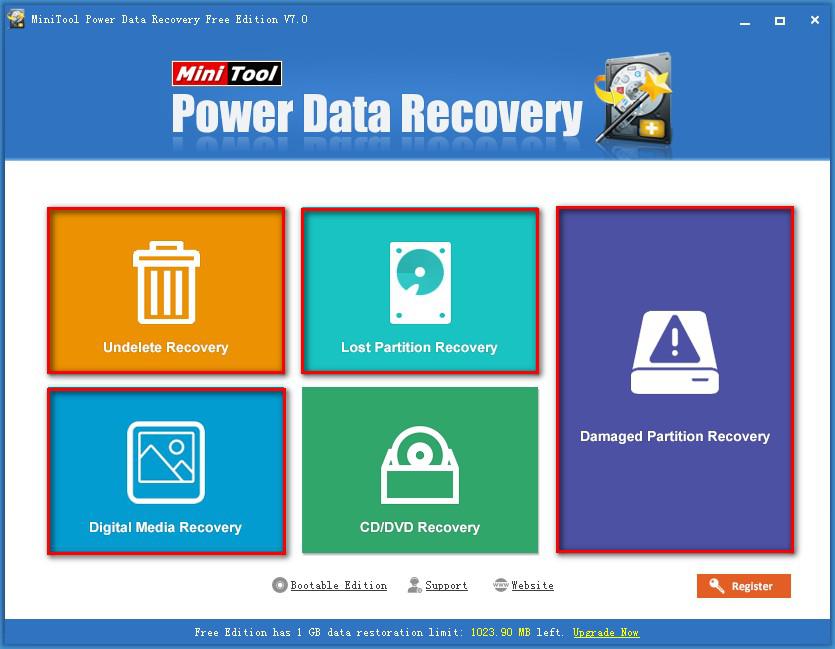
Finish downloading and installing the software as soon as you can. Then, launch it to enter the main interface with five functional modules displayed. Different modules should be chosen for pictures recovery in different situations.
Recover photo 4

  • Picture recovery methods for hard drive, mobile hard drive, SD card, memory stick and other magnetic devices: if the deleted or lost photos lie in computer hard drive, users only need to open MiniTool Power Data Recovery and choose a module to start recovery. However, if users want to recover photos deleted or lost from mobile devices, such as SD card, mobile hard drive and memory stick, they need to take out the mobile device from its original device carefully. Then, connect it directly to computer (if allowed) or put it into a card adapter and then connect it to computer.

    Now, users can choose “Undelete Recovery”, “Lost Partition Recovery”, “Damaged Partition Recovery” or “Digital Media Recovery” to recover lost photos. Figuring out the main using range of them could be really helpful for an anxious user.

    Undelete Recovery” is mainly used to recover accidentally deleted files and folders. So if users’ photos are lost due to accidental deletion and they can access the device as usual (just can’t find some photos in this device), this module is the best choice.

    Lost Partition Recovery” module is suitable for pictures recovery from a missing partition. In this situation, users can’t see the whole partition, instead of certain photos in it. At this time, they have to choose this one to recover photos from missing hard drive partition.

    Damaged Partition Recovery” is useful when users encounter the situation when they fail to enter an existing partition or when they can only see messy codes after entering certain partition.

    Digital Media Recovery” is originally designed to recover photos, videos and other kinds of multimedia data from multimedia storage devices including flash drives and memory sticks.
    Recover photo 5
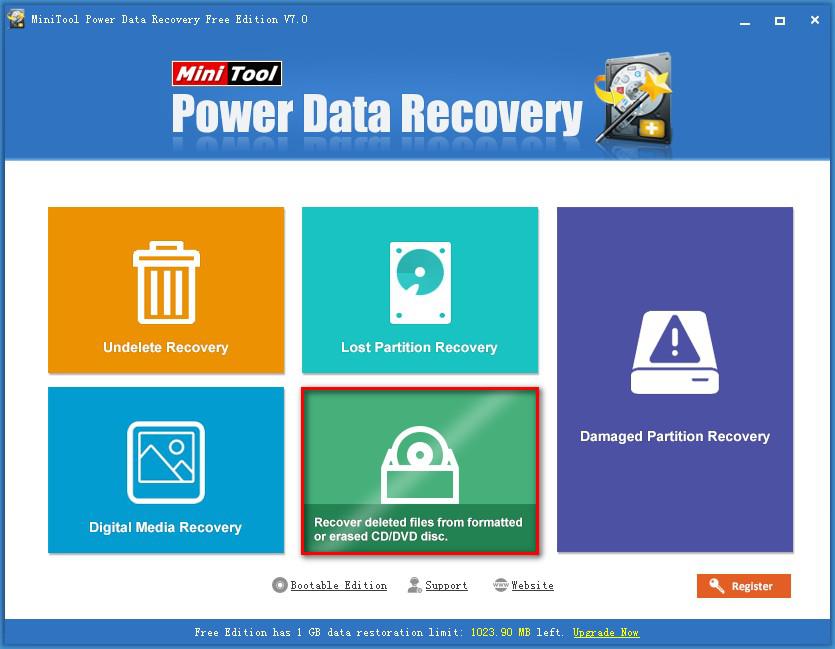
  • How to recover deleted photo files on computer from CD/DVD: as users can see, there is a functional module called “CD/DVD Recovery” in the main window of software. Just by looking at the name, users can easily draw the conclusion that it is able to recover deleted files from formatted or erased CD/DVD.

  • Can we recover photos from mobile phone internal storage: as the popularity of mobile phones and the pixel of camera phones are increasing, the question – whether photo recovery from mobile phone internal storage is possible or not – is put forward now and then. However, that really depends on whether the mobile phone gives support for USB Mass Storage mode.

    If it does support this, users can recover deleted pictures from mobile phone internal storage in the way of regarding it as a mobile device like SD card. Nevertheless, if it can’t support this unfortunately, we’re sorry that we can’t help users recover data from mobile phone internal storage currently.

If users would like to know more about this free digital picture recovery software and its functional modules, please go there to see detailed information.

Several Common Photo Formats

We realized the necessity of letting you know some frequently used formats of photos. That is because: in this way, you’ll be capable of recognizing different types of photos easily by just looking at the file name (including file suffix).

  • BMP: being the abbreviation of Bitmap, BMP is the standard image file format in various operating systems. It can be perfectly supported by multiple Windows applications. BMP picture has been using widely due to the popularity of Windows and its applications. Two obvious features of BMP format are respectively containing rich image information and almost having no compression. Precisely because of this, its biggest shortcoming is showing - taking up too much disk space.

  • GIF: short for Graphics Interchange Format, GIF is featured with high compression ratio, less disk space usage and being capable of saving up to 8-bit color digital images. As a result, it can make use of at most 256 kinds of colors to display objects. Thus, for objects with complex color composition, it is powerless. At present, the extensive use of colorful animation files can be found on Internet with a format of GIF89a.

  • JPG: it is a picture format developed by Joint Photographic Experts Group. In general, the extension of JPEG files is “.jpg” or “.jpeg”. It uses lossy compression method to remove the redundant image as well as color data so as to achieve extremely high compression ratio and vivid picture. In other words, JPG makes it possible to obtain good picture quality with a minimum usage of disk space. Wouldn’t that be wonderful?

  • PNG: also known as Portable Network Graphics, PNG is a new web image format. It draws on the advantages of GIF and JPG, becoming the best format to guarantee undistorted image. PNG can be stored in rich forms and is able to make image files be compressed to the limit.It is in favor of network transmission, and can retain all the information related to image quality. The advantages of PNG are having a fast displaying speed and giving support for transparent images production, while its obvious disadvantage is not supporting animation effect.

  • PSD: standing for Photoshop Document, PSD is the proprietary format of the famous Adobe image processing software – Photoshop. PSD is actually regarded as a “draft map” for Photoshop graphic design. Multiple design sample manuscripts including image layers, channels and masks are included here. However, the disadvantages lie in large disk space usage and poor universality.
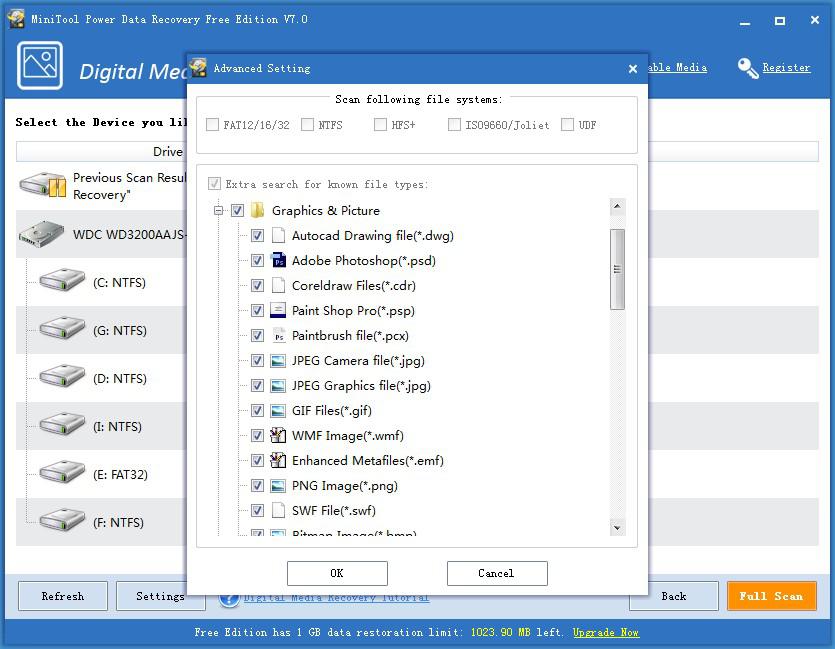
    Recover photo 6
Please don’t worry too much when you’re in face of losing photos in different formats. Our Power Data Recovery supports almost all common photo formats you may see in daily use.

CD/DVD Recovery

What’s CD/DVD Recovery

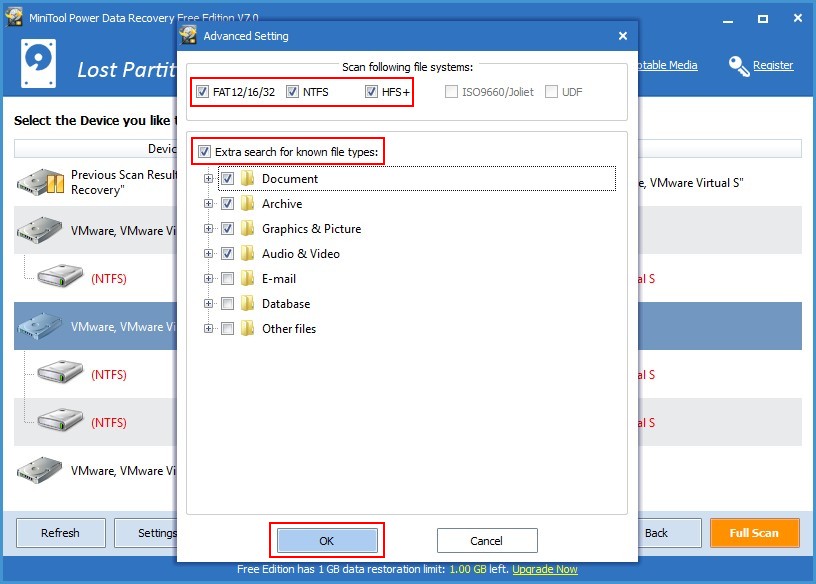
The “CD/DVD Recovery” module is designed specifically to recover lost and deleted files from damaged, scratched or defective CD and DVD disks. This module can recover data recorded by common CD/DVD writing software. It supports data recovery from almost all CD and DVD disk types (CD-ROM, CD-R, CD-RW, DVD-ROM, DVD-R, and DVD-RW), and from quick formatted raw disks. It also supports disk recorded with UDF packet writing software: DirectCD, InCD, packetCD. The recovery wizard allows you to easily scan and recover files. 

The “CD/DVD Recovery” module is easy to use, featuring step-by-step interfaces that will guide you through several stages of data recovery. All you have to do is to click the "Open" or "Full Scan" button. And then wait until the scan is completed. You will get your deleted or lost files back in minutes. 

The "Open" function could open the CD/DVD disk directly. And all the tracks on the disk and file system will be listed in this module. This function could help you recover files from multi-session disk, scratched or defective CD and DVD disks.

The "Full Scan" function could full scan the disk to help you recover data from damaged, formatted and uninitialized disk. 

Detailed Steps to Recover Files with “CD/DVD Recovery” Module


1.Select “CD/DVD Recovery” module in the main interface of Power Data Recovery.


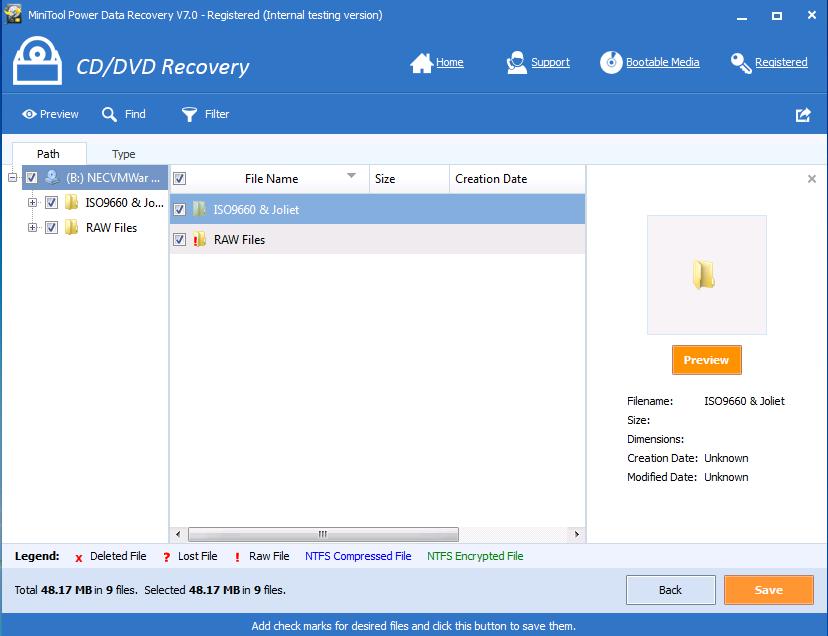
2.Choose a CD/DVD drive and click “Full Scan”.


3.Select the found files and click “Save”.


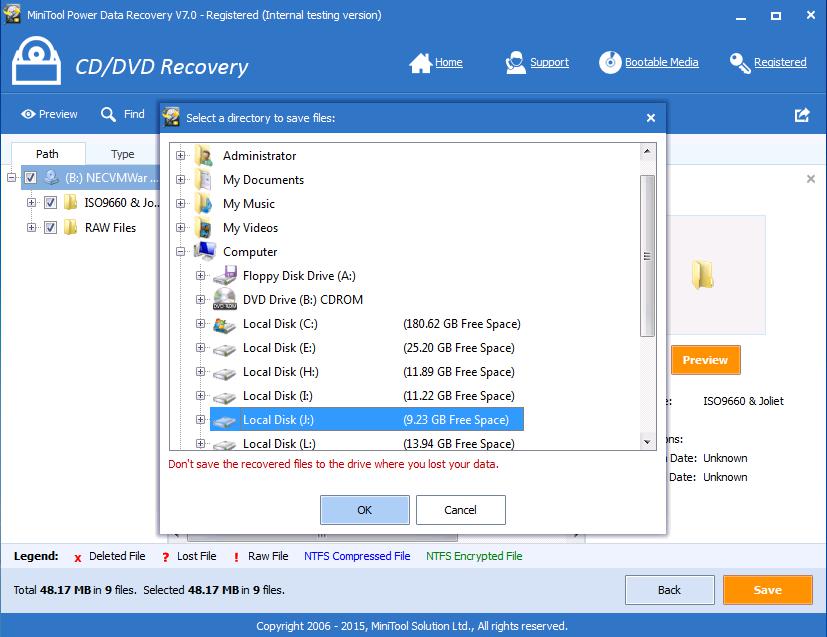
4.Choose another drive and click “OK”.


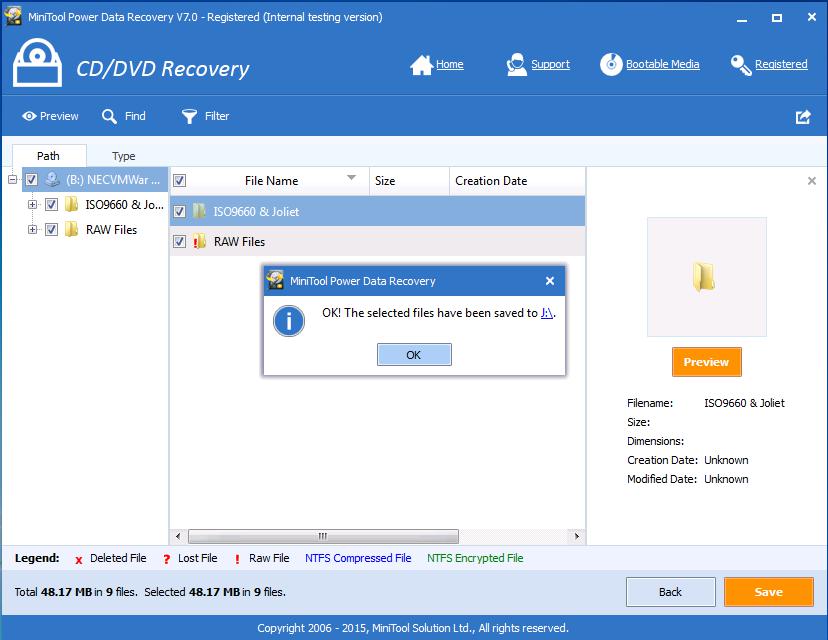
5.Click “OK” after the chosen files are saved to another drive.

Currently, the “CD/DVD Recovery” module supports the following file systems: ISO9660, Joliet and UDF.

CD/DVD File System

CD and DVD discs contain a certain file system. The file system describes where the files and folders are located on the media. In most cases the different file systems point to the same files and can support different operating systems. In some cases however, file systems do differ and one file system may for instance contain a driver to be able to read another file system. The “CD/DVD Recovery” module can scan all file systems it knows and will show them all.

This allows users to select the file system they require. It is a very powerful feature of this recovery module in its quest to be able to recover “all” data!

Sunday, October 23, 2016

Computer and IT News Careers, Technology, Reviews: Extend Different Types of Dynamic Volumes with Screenshots Given

Computer and IT News Careers, Technology, Reviews: Extend Different Types of Dynamic Volumes with Screenshots Given

Extend Different Types of Dynamic Volumes with Screenshots Given


A Brief Introduction to Dynamic Disk

As we know, dynamic disk is introduced since Windows 2000, and now it is more and more widely used for we can create different types of dynamic volumes to optimize computer performance. For example, we can create mirrored volume to create copies for important partition in case of software or hardware failure, or create striped volume to promote data write speed, or create spanned volume to make full use of disk space. Please see Dynamic Disk to get more information about 5 types of dynamic volumes. However, after a period of time we may find certain dynamic volume is running in low disk space, thus bringing us many troubles or problems. For instance, computer runs slowly since there is little free space left in boot volume (the volume saving Windows files); or new files cannot be saved to a specified volume.

What Should We Do When Dynamic Volumes Are in Low Disk Space

If all dynamic disks do not have much free space left, definitely we had better add more hard disks, but this situation is not commonly seen. When some volumes are running out of space but some are full of unused space, extending volume is undoubtedly the best solution, and this is what we concentrate on today. In this post we will extend different types of dynamic volumes by using 2 partitioning programs. One is Windows snap-in Disk Management utility, and the other is third party partitioning software.

Extend Dynamic Volumes in Windows Disk Management

On dynamic disks we can create simple volume, spanned volume, mirrored volume, striped volume, and RAID 5 volume. To enlarge different types of dynamic volumes, we should take different operations, and next we will introduce them one by one.

1.Extend Simple Volume and Spanned Volume

It is much easier to enlarge these simple volume and spanned volume compared with extending other types of volumes, and detailed steps are as follows:
Firstly, open Disk Management to get the following interface:

extend simpe and spanned volume in disk management

Then, right click the simple or spanned volume which needs enlarging and choose “Extend Volume” feature from the popup menu to get the welcome interface of Extend Volume Wizard, and here we only need to click “Next>” to get the window below:

extend simpe and spanned volume in disk management 1

Now we can use space on one or more disks to extend the target simple volume or spanned volume. Tip: a basic disk can also be selected, but it will be converted to dynamic disk finally; in addition, extending a simple volume to a different dynamic disk will make it become a spanned volume. Disk 2 is selected by default, but we can add Disk 0 and Disk 1 by selecting them and click “Add>” respectively. Then, select the mount of space in MB from each disk to extend the very volume. After that, click “Next>” to continue. At last, click “Finish” to perform all changes, and after that we can say a simple volume or spanned volume has been enlarged.

Nevertheless, extending simple volume does not go smoothly all the time, and users may be troubled by the following problem, which comes from SevenForums, a famous forum talking about Windows 7:

How can I extend my C drive volume? I tried using disk management, but the "Extend volume" option for C drives fade off while other drives are not. Any idea how to extend the drive?

What causes this problem and how to fix the issue? From Microsoft we know we can extend system volume or boot volume only when there is contiguous unallocated space on the right side, and to create such an unallocated space by shrinking an existing volume or moving existing unallocated space to be the right place can fix the issue.

However, in old versions of Windows OS like Windows XP and Windows Server 2003, there is no feature to shrink and move a volume, and the only way to create such an unallocated space is to delete the volume after drive C, but it will lead to data loss. In addition, though “Shrink Volume” feature has been added to Disk Manager of Windows Vista and its successors, the shrunk space cannot be contiguous to system volume only if it comes from the system volume.

Moreover, if the simple volume or spanned volume is formatted with FAT32, we will be unable to extend it in Disk Management since “Extend Volume” works to NTFS and RWA partition only. Therefore, to extend system volume or FAT32 volume, users had better turn to a third party partitioning program, and we will be introduced later.

2.Extend Mirrored Volume in Disk Management

A mirrored volume cannot be extended in Windows disk manager unless we break the mirror in advance. Steps to enlarge mirrored volume are as follows:

break mirrored volume

  • Right click the mirrored volume and choose “Break Mirrored Volume”.

  • mirrored volume becomes simple volume after break

  • Now the original mirrored volume becomes a simple volume so that we can extend it via the feature “Extend Volume”. After extending, add mirror for the volume again.
TIP:
1.If the mirrored volume is system volume, we will be unable to enlarge it even if the mirror has been broken, because space for system partition should be contiguous, which has been introduced just now.
2.If we accidentally extend the simple volume broken from a mirrored volume to another dynamic disk, it will become spanned volume. However, spanned volumes cannot be mirrored. After a spanned volume is created, we cannot delete any portion of the volume unless we delete the entire volume.

Therefore, though a mirrored volume can be extended in Disk Management, operations are relatively complex and dangerous, which may bring damage to data. Actually, we can turn to a third party partitioning tool to do it for this kind of software will simplify operations as well as provide data protections. More importantly, there is no need to break the mirror. Steps to enlarge a mirrored volume in partitioning program will be shown later.

3.Extend Striped Volume and RAID 5 Volume in Disk Management

Unfortunately, Windows built-in Disk Management tool does not provide a function to extend both striped volume and RAID 5 volume:

no function to extend striped volume disk management Copy

Summary: Disk Management utility of Windows will fail to extend dynamic volumes in many situations, so next we will introduce a wonderful partitioning tool which can break these limitations, and it is MiniTool Partition Wizard.

How to Extend Dynamic Volumes with MiniTool Partition Wizard

We have said Windows Disk Management have difficulties in expanding system volume, boot volume, mirrored volume, striped volume and RAID 5 volume, so the following demonstrations will focus on solving these problems.

Extend System or Boot Volume in MiniTool Partition Wizard

When the program has been installed, we need to launch it to get the main interface shown below:

view system volume in partition wizard

Here we can see drive C is the very system volume or boot volume. To increase its space, we need to create an unallocated space right after the volume at first since space for boot or system volume should be contiguous. Next, let’s shrink volume D to get such a space, but this operation should be on the condition that there is enough unused space left in volume D. If this volume does not have much free space available, corresponding solution will be introduced later. Select volume D and choose “Move/Resize Volume” feature from the left side to get the window below:

shrik volume D to create unallocated space

The green handle in this interface represents volume D, and to shorten the handle by dragging the left triangle rightwards will generate an unallocated space on the left side of volume D (namely right contiguous to volume C). Then, click “OK” to go back to the main interface below:

shrik volume D to create unallocated space apply change

Now a 30.5GB unallocated space has been created after drive C, and we need to click “Apply” button to make this change performed. Tip: for data security, MiniTool Partition Wizard will ask us to restart computer, and we only need to do as it tells. All operations can be done after a while. When our computer reboots successfully, we can enter Disk Management console to extend system volume:

extend system volume in disk management

Right click the system volume and we will find “Extend Volume” feature has been available, so please enlarge drive C in accordance with extending wizards.

As a matter of fact, shrinking volume D is not the only way to create unallocated space right contiguous system volume. We can shrink any other volume on the same disk to get unallocated space, and then move the unallocated space to be adjacent to drive C step by step. Please see Move/Resize Volume to get more information.

Extend Mirrored Volume in MiniTool Partition Wizard

In Partition Wizard we can increase space of mirrored volume without breaking the mirror, and detailed steps are shown below:

extend mirrored volume in partition wizard choose corresponding function

From the interface above we know volume I is a mirrored volume. To enlarge it, we need to select it and choose “Move/Resize Volume” feature to get the window below:

lenghthen volume handle to extend mirrored volume

Here as long as we lengthen the “yellow” handle we can increase the capacity of the mirrored volume. Then, click “OK” to go back to the main window of Partition Wizard:

extend mirrored volume in partition wizard preview effect

Now we can see the capacity of volume I becomes 56.09GB from the original 19.53GB, but this is a preview effect only. Therefore, we need to click “Apply” button to make all these changes applied. Tip: doing this operation will also require us to restart computer to protect data.

However, when extending mirrored volume by using MiniTool partitioning program users may encounter the situation where it is impossible to lengthen the handle of the mirrored volume, and this is largely because there is no unallocated space on one or some of dynamic disks where the mirrored volume is created. What’s the reason? As we know, each dynamic disk should contribute the same capacity to creating mirrored volume. If there is no unallocated space on one dynamic disk, extending naturally will be impossible.

Enlarge Striped and RAID 5 Volume in MiniTool Partition Wizard

Steps to extend RAID 5 volume are nearly the same as those to expand striped volume, so here we just take increasing striped volume size for example.

extend striped volume select the striped volume

In this demonstration volume L is a striped volume. To extend it, we need to select it and choose “Move/Resize Volume” feature from the left side. After that, the following window will appear:

extend striped volume lengthen volume handle

Like extending a mirrored volume, we can lengthen the “purple” handle to enlarge a striped volume, and then click “OK” to continue.

extend striped volume apply change

Interface above shows the striped volume has been extended to 76.43GB from original 29.30GB. At this time we can click “Apply” button to make the preview effect finally performed. By the way, remember to restart computer as told to protect data.

Tip: if there is no unallocated space on one of dynamic disks where striped volume is created, we will fail to enlarge the striped volume, and the same problem has been introduced in extending mirrored volume part. And we just need to create an unallocated space by shrinking an existing volume.

From all demonstrations above we know MiniTool Partition Wizard does much better in extending dynamic volumes than Windows snap-in Disk Management utility. But before using this program, users need to know something about it.

Edition Information about MiniTool Partition Wizard

Partition Wizard is a multi-functional partitioning toolkit developed by the Canadian software development company MiniTool Solution Ltd. It contains 5 editions, including free edition, professional edition, server edition, enterprise edition, and technician edition. For details of each edition please see Compare Main Features. However, the free edition does not support dynamic disk, so users may need to purchase the professional edition at least for dynamic disk support. In addition, if you are running a server, please purchase the server edition. Though advanced editions are chargeable but economical. And a bootable is provided, which can work when Windows cannot start.

How to Repartition Dynamic Disk without Losing Any Data

Nowadays, dynamic disk becomes more and more popular among technicians since it allows users to create different types of volumes to enhance computer performance and data security. Nevertheless, after a dynamic disk has been partitioned, users will be unable to perform some operations in Disk Management unless they suffer data loss. For example, if volumes with data saved have been created, users can not convert dynamic disk to basic unless they delete all existing volumes; if users want to label a volume or change volume cluster size, all its files will be deleted. Well then, how to repartition a dynamic disk without losing data? Here, we suggest using third party partitioning program.

Among multiple partitioning tools we recommend using MiniTool Partition Wizard since it can help complete lots of partitioning operations on dynamic disk without data loss, including convert dynamic disk to basic, extend volume, shrink volume, move volume location, copy volume, change volume cluster size, change volume label, and so on. Next, let’s see how this partitioning program helps repartition dynamic disk without data loss. Note: MiniTool Partition Wizard Free Edition does not support operating dynamic disk, so please download one of more advanced editions.


How to Repartition Dynamic Disk without Losing Data


Firstly, launch MiniTool Partition Wizard to get its main interface:

minitool partition wizard disk managment

In this interface all disk management functions are shown on the left pane, containing Copy Partition Wizard (clone a single volume), Convert Dynamic Disk to Basic, Surface Test (for bad sector detection), and Show Disk Properties. At this time, if we select a dynamic volume, all volume management functions will appear on the left side:

minitool partition wizard volume management

Among these functions Move/Resize Volume, Change Volume Label, Change Volume Letter, and Change Volume Cluster Size can help reparation the dynamic disk without losing data. Just choose the most suitable function and perform operations as MiniTool Partition Wizard told. At last, users should remember to click “Apply” button on the top left corner to apply all previous changes. That is because no operation will be made before we click this button.

If users also want to know how to repartition dynamic disk without losing data, try recommended partitioning tool.

Tuesday, October 18, 2016

Two Solutions to Create New Partition Grayed out Issue in Windows XP

Can't Create New Partition Windows XP on Unallocated Space


windowsxp As you know, there is a built-in disk tool which is called Disk Management that can be used to create new partition or simple volume in Windows XP/7/8/10 PCs. This free tool has a feature "New Partition" in Windows XP which can help you to quickly create some new partitions when there is a need. However, sometimes you will find out this feature grayed out, which means you can’t create any partition with the unallocated space by using this utility. When you search "create new partition grayed out Windows XP", you will find there are many forums and posts about this problem. Let’s look at two examples.

      Questions:

    • "I just bought a 3TB external hard drive and noticed it read data very slowly, especially when I first opened it in explorer, so I tried to partition this disk. I used Disk Management to repartition the hard drive and planed to divide the disk into 3 parts: one partition is 1.3 TB, and two partitions are both 700 GB. The 1.3 TB one is the primary volume, and I successfully created the first 700 GB partition into a simple volume, but when creating the second one, the option "new partition" is greyed out". –sevenforums


  • "Yesterday my sister told me she had a 100GB hard drive with 4 partitions and some unallocated space. The first three partitions are primary partitions, the fourth one is a logical partition and the unallocated space is at the end of the hard drive. She wanted to create a new partition but the unallocated space can’t create partition with Disk Management in Windows XP. Why did this issue happen?"

After knowing the situations, you may want to ask why can’t create new partitions in Windows XP and how to solve this issue.

Why Create New Partition Grayed out in Windows XP


The above content introduce you "new partition" grayed out in two different cases. Generally speaking, there are two reasons which can cause this issue.

As you know, the hard drive can be divided into two different types, MBR and GPT. Just as the first example says, after repartitioning the MBR disk as 1.3 TB and 700GB partitions, you will find Disk Management shows two unallocated spaces. It is because MBR supports at most 2TB hard drive. As a result, the rest disk space is shown as unallocated space and you can’t create new partition.

new partition grayed out

Besides, the second example shows you still are unable to create new partition. Why? In fact, you can only create at most 4 primary partitions, or 3 primary partitions plus one extended partition on MBR disk. When there are already 3 primary partitions plus extended partition, Disk Management doesn’t allow creating new partition with the unallocated space.

disk management


However, how to solve this issue in such cases? Two solutions are helpful as follows.

How to Solve New Partition Grayed Out Issue


Solution 1: Convert MBR to GPT


If you have a hard drive which is larger than 2TB in Windows XP, the rest part will be shown as unallocated space and it doesn’t allow creating partition. In addition, if there are four primary partitions, and you want to create a new partition for data storage, but it will fail. Therefore, to make full use of the disk space and create many partitions, you can convert this MBR disk to GPT disk.

You may considering using Disk Management to convert to GPT. However, this way requires you to delete all partitions and then you can finish this work successfully. Fortunately, MiniTool cooperation provides you a professional partition and disk management to do this work. Download MiniTool Partition Wizard Free Edition and then start to convert the disk to GPT.

Here is the step-by-step guidance:

Step 1: Launch MiniTool Partition Wizard and you can see its main interface.

Step 2: Right click the hard drive and select "Convert MBR Disk to GPT Disk". Or after selecting a target disk, select this feature in the left pane.

convert mbr to gpt

Step 3: Finally, click "Apply".

Then after finishing the conversion, it is easy to create a partition in Windows XP/7/8/10.

Note: In Windows XP, only the 64 bit OS supports GPT disk and the disk must be data disk.

Solution 2: Set Partition as Logical


When there are three primary partitions, one logical partition and some unallocated space in the hard drive, just as the second example explains, you can also use MiniTool Partition Wizard to create a new partition easily. And this freeware makes up for the deficiency of Disk Management.

create partition

In addition, if there are four primary partitions, you can’t create new partition. And if you don’t want to use GPT disk, you can change one primary partition as logical and then create partitions in Windows XP.

Step 1: Launch this application.

Step 2: Select the primary partition followed by unallocated space to convert and choose "Set Partition as Logical" feature from the left panel. Or you can right click the target partition and select this feature.

set partition as logical

Note: You had better not convert partitions which are related to Windows system to logical, because it may make system unbootable in Windows XP.

Step 3: At last, click "Apply" button on the top to perform changes.

apply

Tip: When unable to create new partition, this article Fixed - No Free MBR Slots While Creating/Splitting Partition Using Partition Wizard is useful.

In conclusion, this post introduce you two reasons and two solutions about "create new Partition grayed out Windows XP" issue. Just try MiniTool Partition Wizard Free Edition to create partitions in Windows 10/8/7/XP/Vista when this issue happens. Download it not.

Watch How To Retrieve Deleted Files On PC Step By Step

In the age of information, digital data is an indispensable part of our life. We are used to saving our thesis, study materials, personal data, business documents and many things in computer. Well, those files are often so important to us that we can’t afford to lose them. Thus, the demand for deleted file recovery and lost file recovery is increasing.

How to retrieve deleted files on PC 1

Yet, the real difficulty lies in a lot of ordinary/inexperienced computer users don’t even have a clue how to retrieve deleted files on PC. Discovering this, we decide to introduce about data deletion, data loss problem and the exact way to recover lost files.


Please don’t be worried; what we’ll say in the following parts is easy to understand and the way we’ll provide is even suitable for users who have never done recovery work to get back missing files.

Tweet This Now

Now, let’s dive right in file deletion and data loss cases.

What Happens When File Is Deleted/Lost


Actually, even if you empty the Recycle Bin in Windows to delete files permanently, the files will not disappear; we just lose entries to them. And the situation is the same when a drive was reformatted or the boot sector was damaged. So, what’s going on when we delete a file on a Windows PC?

link This is a detailed guide on Recycle Bin recovery.

In Windows, if we delete a file by using the conventional approach, the file content itself will not be really cleared.

For example, if we delete a file in Windows Explorer, Windows will put the file into Recycle Bin. Even if we Empty Recycle Bin (or disabled the Recycle Bin function before deletion in order to omit the confirmation box), the actual data file will not actually be erased by OS (operating system).

The file deletion process in Windows actually refers to the following actions: changing the first letter of file name into a special character and marking the clusters occupied by the file as free and available. Certainly, the corresponding real content is still kept there. When we save new data into this drive the next time, those clusters marked as available may be used, in which case the old file content will finally be overwritten and erased from computer.

As a result, we’re allowed to recover deleted file and folder with the help of third-party tools by bypassing the operating system and operating disk directly. For instance, MiniTool Power Data Recovery is a good choice for Windows, while MiniTool Mac Data Recovery is a good choice for Mac.

How to retrieve deleted files on PC 2

Similarly, when a file is lost suddenly, the real content still exits; it is only the file entry that has been lost or damaged. By making use of the correct recovery tool, we’re also able to get it back.

Note:
If you accidentally deleted or lost an important file, you should stop using the computer immediately. You can’t add new data or even install recovery tool into that drive since it may damage the real content and result in a failed recovery job.

Ways People Often Use to Delete a File on PC

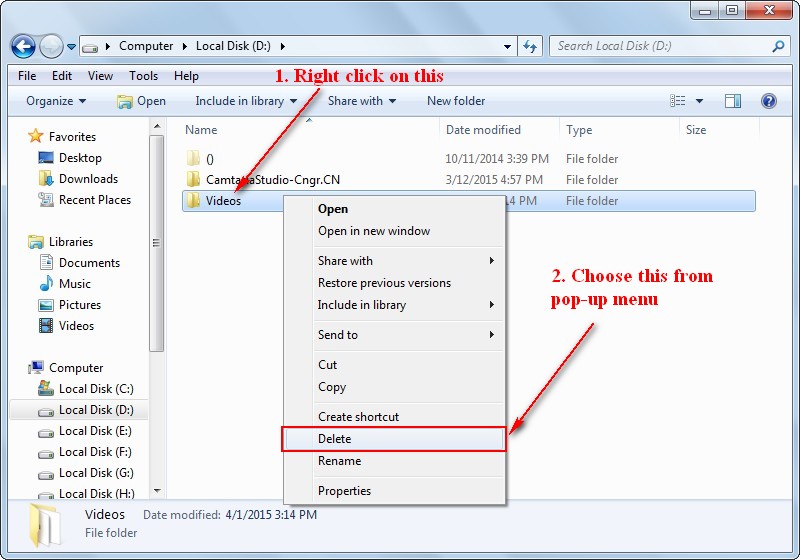
Speaking of file deletion methods, most people’s natural response is pressing "Delete" button or choose "Delete" from right click menu.

Yet, in addition to it, there’re also many other commonly used methods for deleting a file.

  • Use traditional ways:
  • a). drag files or folders into Recycle Bin;
    b). select the files or folders -> press "Delete" button -> click on "Yes" to confirm;
    c). select the files or folders -> press "Delete" and "Shift" button at the same time -> click on "Yes" to confirm;
    d). right click on the files or folders -> choose "Delete" from pop-up menu.
    e). you can also employ the CMD commands to finish file/folder deletion.

    How to retrieve deleted files on PC 3

  • Format/Delete partitions: if all the files & folders in a partition are not useful anymore, it would be troublesome to delete them one by one. So, people may choose to format or delete this partition as a whole.

  • Adopt special deletion tools: on the internet, there is much software equipped with the function to help users delete files/folders that can’t be deleted directly in computer.

Note Those Things to Reduce File Loss Possibility

However, no matter which way you choose, once you find you’ve deleted the wrong data, you should close all unnecessary programs and stop using the computer as we suggested.

And then, choose a reliable tool immediately to undelete deleted files as much as possible. As for the detailed steps to recover lost or deleted files on your PC, we’ll give in the next part.

Besides, you need to read the following tips carefully:

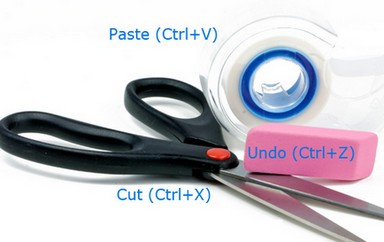
care1 Use Cut and Paste function with caution: we often encounter people asking help in this situation – they cut files from one directory, planning to paste them into another directory; yet unknown error appears in the middle, so he can’t find certain data in neither source directory nor target directory.

How to retrieve deleted files on PC 4

At this time, you can’t rely on Recycle Bin. On the contrary, you’ll have no choice but to rely on data backup or data recovery tools. Thus, we highly recommend that users adopt Copy and Paste, instead of Cut and Paste, since the latter is much safer.

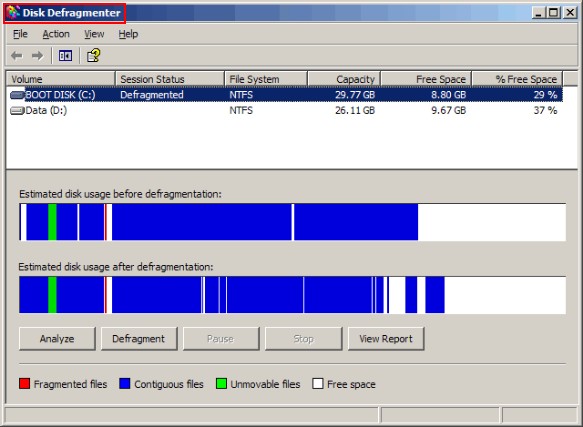
care2 Do not perform disk defragmentation directly: disk defragmentation is frequently used to organize a messy disk so as to improve overall performance. Yet, it is sometimes a dangerous action.

How to retrieve deleted files on PC 5

Why? That is because problems are likely to occur during disk defragmentation and it is relatively hard to recover data lost in this way. Thus, we suggest users to copy or backup partition/data to another drive before disk defragmentation; and then, transfer files back after it.

care3 Don’t employ third-party tool casually to resize drive: on the market, many inferior disk management tool with partition resize function can be found. If you choose such tool to resize partition, any error appeared during resizing may damage your data and make them hard to be recovered.

How to retrieve deleted files on PC 6

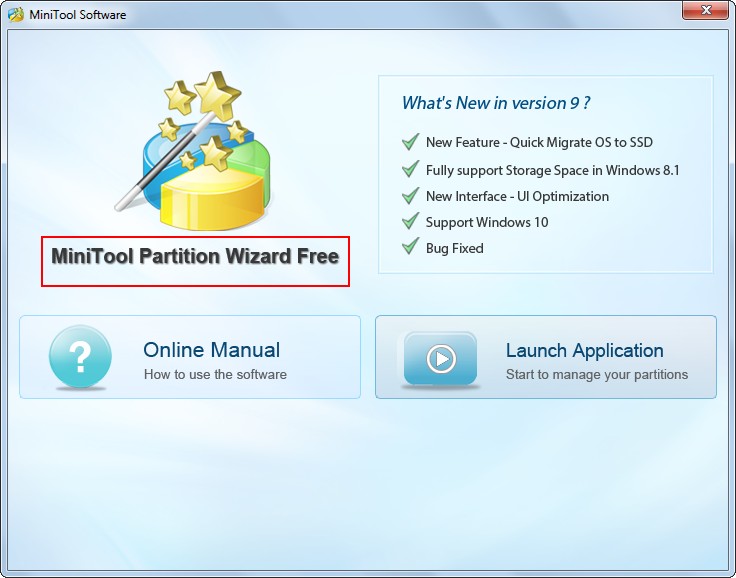
Based on this, we recommend MiniTool Partition Wizard, which has high security.

care4 Backup data on a regular basis: backup is always believed to be the best preventive measure for sudden data loss. No matter how terrible the data loss case is, you’ve got nothing to worry about as long as you have latest backups.

A Closer Look at Popular File Loss Cases

The most important reason why file loss is so popular and attracts the attention of so many people is – there’re a variety of causes for data loss. Now, please allow us to show you some frequently encountered file loss cases.

File Loss Phenomena


first The first type (also the commonest one) is file loss caused by accidental deletion.
Case 1:
"I was working in my laptop and accidentally deleted a whole folder containing from 20 to 25 Word-files. I also emptied the recycle bin then, so no chances to find it there. I don't even remember the location of the folder when it was deleted, maybe the desktop, or maybe another folder inside my Documents. I have read on the Internet that a recovery can be tried both using Microsoft tools, and via an external software to previously download. Suggestions on both directions are very well appreciated. This folder was quite important, so many thanks in advance to anyone who can help me on this. I would like to add that I accidentally deleted the folders 3 days ago (Feb 11), and that only yesterday night (Feb 13) I realized that that folder had been deleted."
– asked by DenisBaldoni on Microsoft’s Community

In this case, the user said that he had accidentally deleted a folder containing 20~25 word files and then emptied the recycle bin. Now, he wants to know how to recover deleted files from Recycle Bin but he can’t even remember the exact location of them.

Case 2:
"Help! I just accidentally clicked "yes" when prompted to permanently delete a couple of files from my USB flash drive. Please tell me there is a way to restore or recover these files! I just tried to restore a previous version, but I only ended up with a shortcut to the original version that I just deleted. Thank you in advance for any solutions."
– asked by Gypsywilde27 on Microsoft’s Community

Similarly, the user in this case also deleted useful files by accident. The only difference is that he has deleted data from his USB flash drive, so the files won’t go into recycle bin; instead, they has already been permanently deleted.

second The second type is file is deleted by partition damage.
"This HDD was connected to my PC but it only has some video files that I can't lose. Seagate. 2TB. Now, when I connect it inside of my PC like extra HDD or using usb adapter, appear a message telling me I need to format it. Please, somebody know how can I to save all my files in that hard drive?"
– asked by carmilanes at Tom’s Hardware Forum

In this post, the user said that the system ask him to format the HDD connected to computer. Now, he can’t access any files inside, so he want to recover those files from HDD.

third The third type is file is deleted by losing partition.
"Hi, I have the same problem. When i plug in the drive, it says that its successfully installed however it does not appear in "my computer". Also when i go into system tools it says that disk 1 is unknown, not initialized, unallocated. Can you please help me, I don’t want to lose my data, it contains all my pics. Please help"
– asked by jenny123 at Windows Seven Forums

Here, by looking at the description – "disk 1 is unknown, not initialized, unallocated", we can confirm that this users’ partition(s) on disk 1 is gone. And all he wants to do know is to recover all his files.

Causes for File Loss Problems


As we said in above part, accidental deletion, partition damage and partition loss are three main factors to cause file loss. Among them, partition damage includes two basic types: users formatted the drive by mistake or the drive is damaged suddenly due to unknown reasons. And the partition loss problem is likewise.

Apart from those, a file can be lost from PC because of unexpected OS crash, suddenly losing of files and many other unknown reasons.

Now, let’s see how to recover lost files under different circumstances.

How to Retrieve Deleted Files on PC

To retrieve deleted files on PC or recover suddenly missing data, first, you need a good assistant – MiniTool Power Data Recovery.

Download it from the reliable website; then, install it to a drive which has not contained any files to recover. After that, run the software.

Download Now
note Note:
If you’re bothered by how to recover deleted files Mac, please choose MiniTool Mac Data Recovery instead.

Recover Permanently Deleted Files


How to retrieve deleted files on PC 7

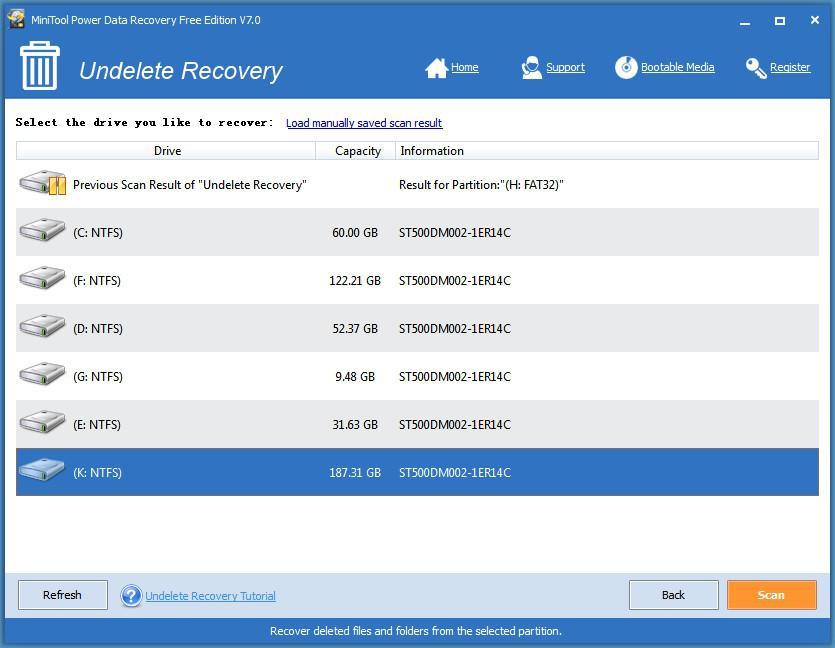
In the main window, you can easily see five functional modules. Actually, they’re designed to solve different data loss cases. Just by looking at the function name, you should select "Undelete Recovery" to undelete deleted files.

How to recover deleted files from Recycle Bin/how to recover deleted files from memory card:

Click on "Undelete Recovery" -> select the drive you’d like to recover files from -> click on "Scan" -> wait for the completion of scan -> look through the scan result and check the ones you need -> click on "Save" button and set a storage location.

When all those operations are done, you can put an end to the recovery work.

Please note that you should connect the memory card to computer before selecting the function module, by using a data line or adapter. Or you’ll need to click on the "Refresh" button to see your memory card sometimes.

Now, we guess you won’t ask questions like "how can I get my deleted files back".

Recover Deleted Files after Virus Attack


How to retrieve deleted files on PC 8

After showing you how to recover permanently deleted files, we’d like to tell you how to recover deleted files after virus attack.

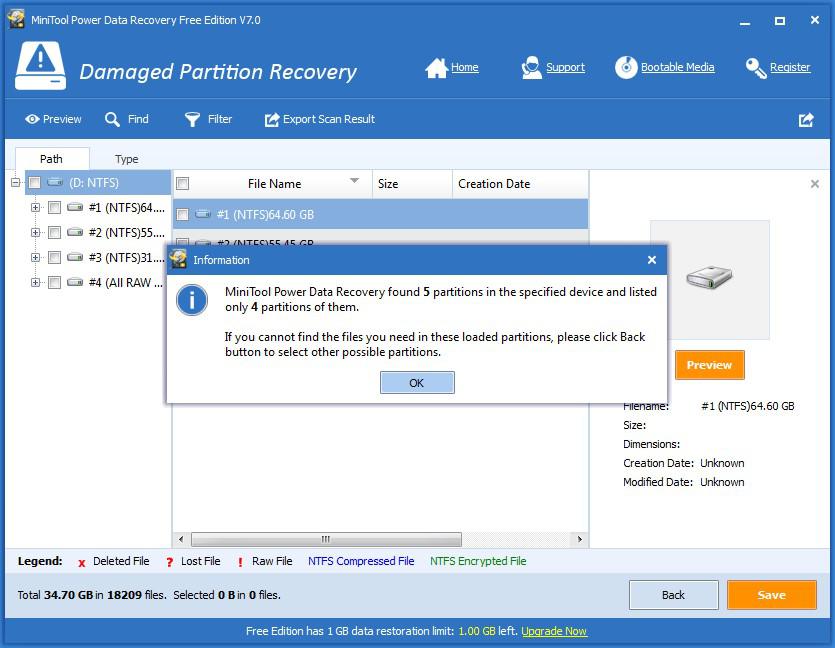
Click on "Damaged Partition Recovery" -> select the damaged drive -> click on "Full Scan" -> wait for the scan -> browse the found files and pick out your desired ones -> click on "Save" button to choose a storage place for them.

note Note:
1.More than one possible partition may be found, you need to check files in them one by one.
2.If the computer can’t boot after attack, please use the bootable edition of MiniTool Power Data Recovery.

Recover Lost Files When Partition Is Gone


How to retrieve deleted files on PC 9

Sometimes, you may find the partition which stores the deleted files you want to recover is missing from computer. In such case, only the "Lost Partition Recovery" function can help you with deleted file recovery.

Share With Others

Well, how to recover lost files on PC from missing partition? Actually, the process of using "Lost Partition Recovery" to recover lost files is almost the same with that of "Damaged Partition Recovery".

The only difference is – in the scan step, you’ll need to select the hard disk which includes missing partition, instead of the damaged/formatted partition.

link Acquire a good solution to retrieve files when HDD suddenly becomes unknown.

Reading here, you must have a good understanding of how to retrieve deleted files on PC in common file loss cases. So we suggest you move now to rescue your lost data quickly.

Summary

We can’t deny the fact that data loss issue happens frequently during our work or study. It often occurs out of sudden, leaving no room for us to rescue our data before they’re deleting from computer. Thus, retrieving deleted files on PC becomes necessary.

Certainly, you can restore lost files from a backup (if you’ve enabled Windows backup function or backed up data manually in advance). But, if you haven’t had any backups or lost the latest backups, you’ll need to look for other way out.

Noticing this, we offer useful recovery methods in order to help all users get out of the terrible data loss situations. By using the recovery tool we recommended in this article, all the users are able to get back what they need in an easy but safe way, unless their data are lost due to deadly hardware failures or have already been overwritten.